Showing posts with label MVC. Show all posts

Thursday, 8 November 2012

Spring MVC REST Calls With HTTP Only

This post describes how to perform REST calls to a Spring MVC application using HTTP only. This example is a variation of the Spring MVC REST Calls With Ajax example. The code is available on GitHub in the Spring-REST-With-HTML-Only directory.

Web.xml

We need to add the HiddenHttpMethodFilter to our web.xml. It searches HTML form PUTs for a _method parameter. If the corresponding value is GET, PUT, POST or DELETE, the call is transformed into a REST call before it is transmitted to the controllers:
...
<servlet-mapping>
    <servlet-name>MyServlet</servlet-name>
    <url-pattern>/</url-pattern>
</servlet-mapping>

<filter>
    <filter-name>hiddenHttpMethodFilter</filter-name>
    <filter-class>org.springframework.web.filter.HiddenHttpMethodFilter</filter-class>
</filter>

<filter-mapping>
    <filter-name>hiddenHttpMethodFilter</filter-name>
    <servlet-name>MyServlet</servlet-name>
</filter-mapping>
...

Main Page

We replace the buttons by HTML post forms:
<%@page contentType="text/html" pageEncoding="UTF-8"%>
<%@ taglib prefix="c" uri="http://java.sun.com/jsp/jstl/core" %>
<!doctype html>
<html lang="en">
<head>
  <meta http-equiv="Content-Type" content="text/html;" charset=UTF-8">
  <title>Welcome To REST With HTML Only !!!</title>
</head>
<body>
    <h1>Welcome To REST With HTML Only !!!</h1>
    <form action="<c:url value='/MyData/123466/'/>"
          method="post" >
        <input type="hidden" name="_method" value="GET">
        <input type="submit" value="GET">
    </form>
    <form action="<c:url value='/MyData'/>"
          method="post" >
        <input type="hidden" name="time" value="555555">
        <input type="hidden" name="message" value="User PUT call !!!">
        <input type="hidden" name="_method" value="PUT">
        <input type="submit" value="PUT">
    </form>
    <form action="<c:url value='/MyData'/>"
          method="post" >
        <input type="submit" value="POST">
    </form>
    <form action="<c:url value='/MyData/654321'/>"
          method="post" >
        <input type="hidden" name="_method" value="DELETE">
        <input type="submit" value="DELETE">
    </form>
</body>
</html>

Controller

We need to modify our controller for PUT calls:
@Controller
@RequestMapping(value = "/MyData")
public class MyRESTController {

    @RequestMapping(value="/{time}", method = RequestMethod.GET)
    public @ResponseBody MyData getMyData(
            @PathVariable long time) {

        return new MyData(time, "REST GET Call !!!");
    }

    @RequestMapping(method = RequestMethod.PUT)
    public @ResponseBody MyData putMyData(
            @RequestParam("time") long time,
            @RequestParam("message") String message) {

        return new MyData(time, message);
    }

    @RequestMapping(method = RequestMethod.POST)
    public @ResponseBody MyData postMyData() {
        return new MyData(
            System.currentTimeMillis(), "REST POST Call !!!");
    }

    @RequestMapping(value="/{time}", method = RequestMethod.DELETE)
    public @ResponseBody MyData deleteMyData(
            @PathVariable long time) {

        return new MyData(time, "REST DELETE Call !!!");
    }

}

Running The Example

Once compiled, the example can be run with mvn tomcat:run. Then, browse:

  http://localhost:8585/spring-rest-with-html-only

The main page will be displayed:

Spring MVC REST Calls With HTML Only


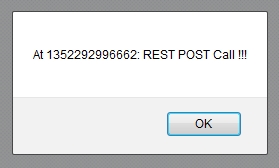
If you click on a button, the corresponding JSON will be displayed:

Spring MVC With HTML Only JSON
More Spring related posts here.

Spring MVC REST Calls From Java

Sometimes, web applications running on servers need to access REST resources located on other servers. From a REST perspective, the physical server act as a logical REST client. This example describes how to proceed. It is based on the Spring MVC REST Calls With Ajax example. The code is available on GitHub in the Spring-Server-Side-REST-Call directory.

Controller

To simulate a remote server, we create a fake remote controller:
@Controller
@RequestMapping(value = "/MyRemoteData")
public class MyRemoteController {

    @RequestMapping(value="/{time}", method = RequestMethod.GET)
    public @ResponseBody MyRemoteData getMyRemoteData(
            @PathVariable long time) {

        return new MyRemoteData(
            "My remote data called at: " + time + " !!!");
    }

}
It return a MyRemoteData object as a JSON:
public class MyRemoteData {

    private String data = "";

    public MyRemoteData() { }

    public MyRemoteData(String message) {
       this.data = message;
    }

    // Setter & Getters

}
We simplify our existing controller to a simple GET. It uses Spring's RestTemplate to make a REST Http GET call to fetch remote data from our 'remote' server:
@Controller
@RequestMapping(value = "/MyData")
public class MyRESTController {

    @RequestMapping(value="/{time}", method = RequestMethod.GET)
    public @ResponseBody MyData getMyData(
            @PathVariable long time) {

        RestTemplate restTemplate = new RestTemplate();

        String remote = "http://localhost:8585/spring-server-side-rest-call/"
            + "MyRemoteData/" + System.currentTimeMillis();

        MyRemoteData mrd = restTemplate.getForObject(
            remote, MyRemoteData.class);

        return new MyData(System.currentTimeMillis(), mrd.getData());

    }

}

Main Page

We simplify our main page and only keep our GET button:
<%@page contentType="text/html" pageEncoding="UTF-8"%>
<%@ taglib prefix="c" uri="http://java.sun.com/jsp/jstl/core" %>
<!doctype html>
<html lang="en">
<head>
  <meta http-equiv="Content-Type" content="text/html;" charset=UTF-8">
  <script type="text/javascript"
    src="https://ajax.googleapis.com/ajax/libs/jquery/1.8.2/jquery.min.js">
  </script>
  <script type="text/javascript"
    src="<c:url value='/resources/js/SpringServerSideRestCall.js'/>">
  </script>
  <title>Welcome To REST With Java !!!</title>
</head>
<body>
  <h1>Welcome To REST With Java !!!</h1>
  <button type="button" onclick="RestGet()">GET</button>
</body>
</html>
Ditto for our javascript:
var prefix = "/spring-server-side-rest-call";

var RestGet = function() {

    $.ajax({
        type: 'GET',
        url:  prefix + "/MyData/" + Date.now(),
        dataType: 'json',
        async: true,
        success: function(result) {
            alert("At " + result.time
                + ": " + result.message);
        },
        error: function(jqXHR, textStatus, errorThrown) {
            alert(jqXHR.status + " " + jqXHR.responseText);
        }
    });

}

Running The Example

Once compiled, the example can be run with mvn tomcat:run. Then, browse:

  http://localhost:8585/spring-server-side-rest-call/

The main page will be displayed:

Spring REST Calls From Java

If you click on get, a pop-up is displayed:


More Spring related posts here.

Wednesday, 7 November 2012

Spring MVC REST Calls With Ajax

This post provides a simple example of REST calls to a Spring MVC web application. It is based on the Serving Static Resources With Spring MVC and Fetching JSON With Ajax In Spring MVC Context example. The code is available on GitHub in the Spring-REST-With-Ajax directory.

Main Page

Our main page contains four buttons linked to Javascript functions performing Ajax calls:
...
<body>
<h1>Welcome To REST With Ajax !!!</h1>
<button type="button" onclick="RestGet()">GET</button>
<button type="button" onclick="RestPut()">PUT</button>
<button type="button" onclick="RestPost()">POST</button>
<button type="button" onclick="RestDelete()">DELETE</button>
</body>
...

Javascript

Our Javascript file contains the four functions:
var prefix = "/spring-rest-with-ajax";

var RestGet = function() {
        $.ajax({
        type: 'GET',
        url:  prefix + "/MyData/" + Date.now(),
        dataType: 'json',
        async: true,
        success: function(result) {
            alert("At " + result.time
                + ": " + result.message);
        },
        error: function(jqXHR, textStatus, errorThrown) {
            alert(jqXHR.status + " " + jqXHR.responseText);
        }
   });
}

var RestPut = function() {

    var JSONObject= {
        "time": Date.now(),
        "message": "User PUT call !!!"
    };
 
    $.ajax({
        type: 'PUT',
        url:  prefix + "/MyData",
        contentType: "application/json; charset=utf-8",
        data: JSON.stringify(JSONObject),
        dataType: 'json',
        async: true,
        success: function(result) {
            alert("At " + result.time
                + ": " + result.message);
        },
        error: function(jqXHR, textStatus, errorThrown) {
            alert(jqXHR.status + " " + jqXHR.responseText);
        }
    });
}

var RestPost = function() {
        $.ajax({
        type: 'POST',
        url:  prefix + "/MyData",
        dataType: 'json',
        async: true,
        success: function(result) {
            alert("At " + result.time
                + ": " + result.message);
        },
        error: function(jqXHR, textStatus, errorThrown) {
            alert(jqXHR.status + " " + jqXHR.responseText);
        }
    });
}

var RestDelete = function() {
        $.ajax({
        type: 'DELETE',
        url:  prefix + "/MyData/" + Date.now(),
        dataType: 'json',
        async: true,
        success: function(result) {
            alert("At " + result.time
                + ": " + result.message);
        },
        error: function(jqXHR, textStatus, errorThrown) {
            alert(jqXHR.status + " " + jqXHR.responseText);
        }
    });
}

Controller

Our controller captures the REST calls and returns a JSON. In a real applications, one would perform CRUD operations rather than returning JSONs:
@Controller
@RequestMapping(value = "/MyData")
public class MyRESTController {

    @RequestMapping(value="/{time}", method = RequestMethod.GET)
    public @ResponseBody MyData getMyData(
            @PathVariable long time) {
  
        return new MyData(time, "REST GET Call !!!");
    }
 
    @RequestMapping(method = RequestMethod.PUT)
    public @ResponseBody MyData putMyData(
            @RequestBody MyData md) {
  
        return md;
    }
 
    @RequestMapping(method = RequestMethod.POST)
    public @ResponseBody MyData postMyData() {
 
        return new MyData(System.currentTimeMillis(),
            "REST POST Call !!!");
    }

    @RequestMapping(value="/{time}", method = RequestMethod.DELETE)
    public @ResponseBody MyData deleteMyData(
            @PathVariable long time) {
  
        return new MyData(time, "REST DELETE Call !!!");
    }
}

Running The Example

Once compiled, the example can be run with mvn tomcat:run. Then, browse:

  http://localhost:8585/spring-rest-with-ajax/

The main page will be displayed:


If you click on any button, a pop-up will be displayed:


See here for more about REST • More Spring related posts here.

Tuesday, 6 November 2012

Spring MVC Error Handling

This post describes the different techniques to perform error handling in Spring MVC 3. The code is available on GitHub in the Spring-MVC-Error-Handling directory. It is based on the Spring MVC With Annotations examples.

Handling Exceptions Before Spring 3

Before Spring 3, exceptions were handled with HandlerExceptionResolvers. This interface defines a single method:
ModelAndView resolveException(
  HttpServletRequest request,
  HttpServletResponse response,
  Object handler,
  Exception ex)
Notice it returns a ModelAndView object. Therefore, encountering an error meant being forwarded to a special page. However, this method is not suited for REST Ajax calls to JSONs (for example). In this case, we do not want to return a page, and we may want to return a specific HTTP status code. A solution, described further, is available.

For the sake of this example, two fake CustomizedException1 and CustomizedException2 exceptions have been created. To map customized exceptions to views, one could (and can still) use a SimpleMappingExceptionResolver:
SimpleMappingExceptionResolver getSimpleMappingExceptionResolver() {

    SimpleMappingExceptionResolver result
        = new SimpleMappingExceptionResolver();

    // Setting customized exception mappings
    Properties p = new Properties();
    p.put(CustomizedException1.class.getName(), "Errors/Exception1");
    result.setExceptionMappings(p);

    // Unmapped exceptions will be directed there
    result.setDefaultErrorView("Errors/Default");

    // Setting a default HTTP status code
    result.setDefaultStatusCode(HttpStatus.BAD_REQUEST.value());

    return result;

}
We map CustomizedException1 to the Errors/Exception1 JSP page (view). We also set a default error view for unmapped exception, namely CustomizedException2 in this example. We also set a default HTTP status code.

Here is the Exception1 JSP page, the default page is similar:
<%@page contentType="text/html" pageEncoding="UTF-8"%>
<%@ taglib prefix="c" uri="http://java.sun.com/jsp/jstl/core" %>
<!doctype html>
<html lang="en">
<head>
  <meta http-equiv="Content-Type" content="text/html;" charset=UTF-8">
  <title>Welcome To Exception I !!!</title>
</head>
<body>
    <h1>Welcome To Exception I !!!</h1>
    Exception special message:<
    ${exception.specialMsg}
    <a href="<c:url value='/'/>">Home</a>
</body>
</html>
We also create a dummy error controller to help triggering these exceptions:
@Controller
public class TriggeringErrorsController {

    @RequestMapping(value = "/throwCustomizedException1")
    public ModelAndView throwCustomizedException1(
        HttpServletRequest request,HttpServletResponse response)
            throws CustomizedException1 {

        throw new CustomizedException1(
            "Houston, we have a problem!");
    }

    @RequestMapping(value = "/throwCustomizedException2")
    public ModelAndView throwCustomizedException2(
        HttpServletRequest request,HttpServletResponse response)
            throws CustomizedException2 {

        throw new CustomizedException2(
            "Something happened on the way to heaven!");
    }

    ...

}
Before Spring 3, one would declare a SimpleMappingExceptionResolver as a @Bean in web.xml. However, we will use a HandlerExceptionResolverComposite which we will describe later.

We also configure a target page for HTTP status codes in web.xml, which is an other way to deal with issues:
<error-page>
    <error-code>404</error-code>
    <location>/WEB-INF/pages/Errors/My404.jsp</location>
</error-page>

What Is New Since Spring 3.X?

The @ResponseStatus annotation is a new mean to set a Http status code when a method is invoked. These are handled by the ResponseStatusExceptionResolver. The @ExceptionHandler annotation facilitates the handling of exceptions in Spring. Such annotations are processed by the AnnotationMethodHandlerExceptionResolver.

The following illustrates how these annotations can be used to set an HTTP status code to the response when our customized exception is triggered. The message is returned in the response's body:
@Controller
public class TriggeringErrorsController {

    ...

    @ExceptionHandler(Customized4ExceptionHandler.class)
    @ResponseStatus(value=HttpStatus.BAD_REQUEST)
    @ResponseBody
    public String handleCustomized4Exception(
        Customized4ExceptionHandler ex) {

        return ex.getSpecialMsg();

    }

    @RequestMapping(value = "/throwCustomized4ExceptionHandler")
    public ModelAndView throwCustomized4ExceptionHandler(

        HttpServletRequest request,HttpServletResponse response)
            throws Customized4ExceptionHandler {

        throw new Customized4ExceptionHandler("S.O.S !!!!");

    }

}
On the user side, if one uses an Ajax call, the error can be retrieved with the following (we are using JQuery):
$.ajax({
    type: 'GET',
    url:  prefix + "/throwCustomized4ExceptionHandler",
    async: true,
    success: function(result) {
        alert('Unexpected success !!!');
    },
    error: function(jqXHR, textStatus, errorThrown) {
        alert(jqXHR.status + " " + jqXHR.responseText);
    }
});
Some people using Ajax like to return a JSON with the error code and some message to handle exceptions. I find it overkill. A simple error number with a message keeps it simple.

Since we are using several resolvers, we need a composite resolver (as mentioned earlier):
@Configuration
public class ErrorHandling {

    ...

    @Bean
    HandlerExceptionResolverComposite getHandlerExceptionResolverComposite() {

        HandlerExceptionResolverComposite result
            = new HandlerExceptionResolverComposite();

        List<HandlerExceptionResolver> l
            = new ArrayList<HandlerExceptionResolver>();

        l.add(new AnnotationMethodHandlerExceptionResolver());
        l.add(new ResponseStatusExceptionResolver());
        l.add(getSimpleMappingExceptionResolver());
        l.add(new DefaultHandlerExceptionResolver());

        result.setExceptionResolvers(l);

        return result;

}
The DefaultHandlerExceptionResolver resolves standard Spring exceptions and translates them to corresponding HTTP status codes.

Running The Example

Once compiled, the example can be run with mvn tomcat:run. Then, browse:

  http://localhost:8585/spring-mvc-error-handling/

The main page will look like this:

Spring MVC Error Handling

If you click on the Exception 1 link, the following page will display:

Spring MVC Exception Handling

If you click on the Exception 2 link, the following page will display:


If you click on the Exception Handler button, a pop-up will be displayed:

Spring MVC Exception Handling Pop-Up

These techniques are enough to cover error handling in Spring.

More Spring related posts here.

Sunday, 4 November 2012

Fetching JSON With Ajax In Spring MVC Context

This post explains how to fetch a JSON using Ajax from a Spring MVC web application. It is based on the Spring MVC With Annotations and Serving Static Resources With Spring MVC examples. The code is available on GitHub in the Spring-Fetching-JSON-With-Ajax directory.

Main Index Page

We use a simple index.jsp page, where we set a button that fetches a JSON, and a <div> where the result will be displayed:
<%@page contentType="text/html" pageEncoding="UTF-8"%>
<%@ taglib prefix="c" uri="http://java.sun.com/jsp/jstl/core" %>
<!doctype html>
<html lang="en">
<head>
  <meta http-equiv="Content-Type" content="text/html;" charset=UTF-8">
  <script type="text/javascript"
    src="https://ajax.googleapis.com/ajax/libs/jquery/1.8.2/jquery.min.js">
  </script>
  <script type="text/javascript"
    src="<c:url value='/resources/js/FetchingJsonWithAjax.js'/>">
  </script>
  <title>Welcome To Fetching JSON With Ajax !!!</title>
</head>
<body>
    <h1>Fetching JSON With Ajax !!!</h1>
    <div id="theJson"></div>
    <button type="button" onclick="fetch_json()">
        Fetch JSON
    </button>
</body>
</html>

Javascript

On the button, we attach the fetch_json() Javascript method, which is called when the button is clicked:
var fetch_json = function() {

    $.ajax({
        type: 'GET',
        url:  "/spring-fetching-json-with-ajax/getJSON",
        dataType: 'json',
        async: true,
        success: function(result) {

            var tmp = "Fetch time is: " + result.milliTime + " !"
               + "and the JSON is:"
               + JSON.stringify(result);

            $("#theJson").html(tmp);

        },
        error: function(jqXHR, textStatus, errorThrown) {
            alert("Issue fetching the JSON: "
                + textStatus + " "
                + errorThrown + " !");
        }

    });

}
If successful, we set the result on the <div>, else we pop-up a message with the error.

Controller

The controller is kept simple, and a MilliTime object is returned for the Ajax call:
@Controller
public class MyController {

    @RequestMapping(value = "/")
    public String home(Model model) {
        return "index";
    }

    @RequestMapping(value="/getJSON", method = RequestMethod.GET)
    public @ResponseBody MilliTimeItem getJSON() {
        return new MilliTimeItem(System.currentTimeMillis());
    }

}

Running The Example

Once compiled, the example can be run with mvn tomcat:run. Then, browse:

  http://localhost:8585/spring-fetching-json-with-ajax/

After clicking on the Fetch JSON button, something similar to the following will be displayed:


More Spring related posts here.

Serving Static Resources With Spring MVC

This post explains how to server static content from a Spring MVC web application. It is based on the Spring MVC With Annotations example. The code is available on GitHub in the Spring-Serving-Static-Resources directory.

JSP Page

We keep only the main index.jsp page:
<%@page contentType="text/html" pageEncoding="UTF-8"%>
<%@ taglib prefix="c" uri="http://java.sun.com/jsp/jstl/core" %>
<!doctype html>
<html lang="en">
<head>
  <meta http-equiv="Content-Type" content="text/html;" charset=UTF-8">
  <script type="text/javascript"
    src="https://ajax.googleapis.com/ajax/libs/jquery/1.8.2/jquery.min.js">
  </script>
  <script type="text/javascript"
    src="<c:url value='/resources/js/SomeJavascript.js'/>">
  </script>
  <title>Welcome To Spring Serving Static Resources !!!</title>
</head>
<body>
    <h1>Spring - Serving Static Resources !!!</h1>
    <img border="0"
      src="<c:url value='/resources/img/MyArt.png'/>" alt="My Art" />
</body>
</html>
Regarding static resources:
  • We link JQuery from Google's CDN.
  • We link our own SomeJavascript.js and make sure the URL is properly constructed.
  • In the body, we add an image.

Resources

Spring Project Structure For Resources
In the Spring project itself, we put all the resources under a separate resources directory which does not stand under WEB-INF.
  • Images are stored under /resources/img.
  • Javascript is storted under /resources/js.
Our Javascript is a simple pop-up messages displayed when the HTML document is loaded:
$(document).ready(function() {
    alert("JS loaded successfully!");
});

Web Configuration & Controller

We need to modify our web configuration to add a static resource handler and configure it by specifying where to fetch these:
@EnableWebMvc
@Configuration
@ComponentScan(basePackages = "com.jverstry")
public class WebConfig extends WebMvcConfigurerAdapter {

    ...

    @Override
    public void addResourceHandlers(ResourceHandlerRegistry registry) {

      registry
        .addResourceHandler("/resources/**")
        .addResourceLocations("/resources/");
    }

}
We also simplify our controller:
@Controller
public class MyController {

    @RequestMapping(value = "/")
    public String home(Model model) {
        return "index";
    }

}

Running The Example

Once compiled, the example can be run with mvn tomcat:run. Then, browse:

  http://localhost:8585/spring-serving-static-resources/

The image and the pop-up will be displayed:


More Spring related posts here.

Thursday, 6 September 2012

Spring MVC Controller JUnit Testing

JUnit testing Spring MVC controllers is not an easy task. But recently, a new project (now included in Spring 3.2) offers new tools to facilitate this. This post illustrates how to test a simple controller via JUnit tests.

This code is a variation of the code used in JUnit Testing Spring Service and DAO (with In-Memory Database). It is available from Gihut in the Spring-MVC-JUnit-Testing directory.

Test Configuration Classes

These are identical to those required for Service and DAO testing.

Controller

Our controller:
@Controller
public class MyController {

    @Autowired
    private MyService myService;

    @RequestMapping(value = "/")
    public String home(Model model) {

        return "index";

    }

    @RequestMapping(value = "/roundtrip")
    public String persistenceStatus(Model model) {

        MilliTimeItem retr = myService.createAndRetrieve();
        model.addAttribute("RoundTrip", retr);

        return "roundtrip";

    }

}

Controller Testing

The following creates an instance of MockMvc to test simulated user requests:
@RunWith(SpringJUnit4ClassRunner.class)
@ContextConfiguration(classes={ JpaTestConfig.class, TestConfig.class })
public class MyControllerTest {

    private MockMvc mockMvc;

    @Before
    public void setup() {

        mockMvc = MockMvcBuilders
            .annotationConfigSetup(JpaTestConfig.class, TestConfig.class)
            .build();

    }

    @Test
    public void testHome() throws Exception {

        mockMvc.perform(get("/"))
            .andExpect(status().isOk())
            .andExpect(forwardedUrl("WEB-INF/pages/index.jsp"));

    }

    @Test
    public void testPersistenceStatus() throws Exception {

        mockMvc.perform(get("/roundtrip"))
            .andExpect(status().isOk())
            .andExpect(forwardedUrl("WEB-INF/pages/roundtrip.jsp"))
            .andExpect(model().attributeExists("RoundTrip"));

    }

}
The / request verifies the returned status and the URL mapping to the JSP page. The /roundtrip request makes sure the returned model does contain the Roundtrip attribute.

Dependencies

The Spring MVC test artifact is not yet available from maven's central repository. It should be obtained from another repository:
<repositories>
    <repository>
        <id>spring.test-mvc</id>
        <url>http://repo.springsource.org/libs-milestone</url>
    </repository>
</repositories>
The required dependency are:
<dependency>
    <groupId>org.springframework</groupId>
    <artifactId>spring-test-mvc</artifactId>
    <version>1.0.0.M1</version>
    <scope>test</scope>
</dependency>
<dependency>
    <groupId>org.hamcrest</groupId>
    <artifactId>hamcrest-library</artifactId>
    <version>1.3</version>
    <scope>test</scope>
</dependency>

More Spring related posts here.

Monday, 3 September 2012

Spring MVC-Service-DAO-Persistence Architecture Example

It is considered good practice to use modularity across Spring web applications. It keeps them maintainable and testable. This can be achieved by using controllers, services and data access objects (DAO). Typically, a user request is handled by a controller, which calls a service, which calls a data access object, which calls the persistence layer implementation.

Using services means that application functionalities can be tested without a test framework simulating user calls to controllers. Separating services from the persistence layer implementation via DAO, allows using an in-memory database (for example) by substituting production DAO implementations, by test DAO implementation pointing to an in-memory database.

The code example used in this post is available from Github in the Spring-MVC-Service-DAO-Persistence-Architecture directory. It is a variation of the Spring Web JPA Hibernate In-Memory example.

MVC Controller Calls The Service Implementation

The following controller is injected with an implementation of MyService. It handles /roundtrip user calls by calling its create() and Retrieve(id) methods, which creates and retrieves an instance of a MilliTimeItem object. It contains a unique ID and a timestamp in milliseconds.
@Controller
public class MyController {

    @Autowired
    private MyService myService;

    @RequestMapping(value = "/")
    public String home(Model model) {
        return "index";
    }

    @RequestMapping(value = "/roundtrip")
    public String persistenceStatus(Model model) {

        long id = myService.create();
        MilliTimeItem retr = myService.retrieve(id);
 
        model.addAttribute("RoundTrip", retr);
 
        return "roundtrip";

    }

}

Service Implementation calls Data Access Objects (DAO)

The DAO is injected in the MyService implementation. The createAndRetrieve() calls the DAO createMilliTimeItem() and getMilliTimeItem() methods. It returns the created and retrieved item.
public class MyServiceImpl implements MyService {

    @Autowired
    private MyPersistenceDAO myDAO;

    @Transactional
    long create();
 
    @Transactional
    MilliTimeItem retrieve(long id);

}

Data Access Object Implementation Calls The Persistence Layer

The DAO implementation is injected with the JPA EntityManager:
@Repository
public class MyPersistenceDAOImpl implements MyPersistenceDAO {

    @PersistenceContext
    private EntityManager em;

    @Override
    public long createMilliTimeItem() {
 
        MilliTimeItem mti = new MilliTimeItem();
        mti.setMilliTime(System.currentTimeMillis());

        em.persist(mti);
        long result = mti.getID();
        em.detach(mti);
 
        return result;
 
    }

    @Override
    public MilliTimeItem getMilliTimeItem(long id) {
        return em.find(MilliTimeItem.class, id);
    }

}

Running the Example

After compiling this example with Maven, it can be run with mvn tomcat:run. Then, browse http://localhost:8585/spring-mvc-service-dao-persistence-architecture/.

The generated output is:
Created MilliTimeItem's ID: 1
Created MilliTimeItem's value: 1346691836108

More Spring related posts here.

Wednesday, 29 August 2012

Spring MVC with Annotations Example

This post describes a simple Spring MVC application example with annotation configuration. This example is available from Github in the Spring-MVC-With-Annotations directory. Typically, a complete application's architecture includes several layers: MVC, Service, DAO, Persistence Layer.

Configuration

In our previous example, we still use a servlet-context.xml file. In this example, we get rid of it using the @EnableWebMvc annotation.

The web.xml file:
<?xml version="1.0" encoding="UTF-8"?>
<web-app version="2.5" xmlns="http://java.sun.com/xml/ns/javaee"
    xmlns:xsi="http://www.w3.org/2001/XMLSchema-instance"
    xsi:schemaLocation="http://java.sun.com/xml/ns/javaee http://java.sun.com/xml/ns/javaee/web-app_2_5.xsd">

    <context-param>
        <param-name>contextClass</param-name>
        <param-value>org.springframework.web.context.support.AnnotationConfigWebApplicationContext</param-value>
    </context-param>

    <context-param>
        <param-name>contextConfigLocation</param-name>
        <param-value>com.jverstry.Configuration</param-value>
    </context-param>

    <listener>
        <listener-class>org.springframework.web.context.ContextLoaderListener</listener-class>
    </listener>

    <servlet>
        <servlet-name>MyServlet</servlet-name>
        <servlet-class>org.springframework.web.servlet.DispatcherServlet</servlet-class>
        <init-param>
            <param-name>contextConfigLocation</param-name>
            <param-value></param-value>
        </init-param>
        <load-on-startup>1</load-on-startup>
    </servlet>

    <servlet-mapping>
        <servlet-name>MyServlet</servlet-name>
        <url-pattern>/</url-pattern>
    </servlet-mapping>

    <welcome-file-list>
        <welcome-file></welcome-file>
    </welcome-file-list>

</web-app>
We do not set a default welcome file. It is delegated to our controller.

The Java configuration class:
@EnableWebMvc
@Configuration
@ComponentScan(basePackages = "com.jverstry")
public class WebConfig extends WebMvcConfigurerAdapter {

    @Bean
    public ViewResolver getViewResolver() {

        InternalResourceViewResolver resolver = new InternalResourceViewResolver();
        resolver.setPrefix("WEB-INF/pages/");
        resolver.setSuffix(".jsp");

        return resolver;

    }

}
The @ComponentScan annotation tells Spring to scan the content of packages for Spring annotated classes.

JSP pages

We have two JSP pages in  the WEB-INF/pages/ directory.

index.jsp
<!doctype html>
<html lang="en">
<head>
  <meta charset="utf-8">
  <title>Welcome !!!</title>
</head>
<body>
  <h1>
    Welcome To Spring MVC With Annotations !!!
  </h1>
</body>
</html>
getTime.jsp 
<%@page contentType="text/html" pageEncoding="UTF-8"%>
<%@ taglib prefix="c" uri="http://java.sun.com/jsp/jstl/core" %>
<!DOCTYPE html>
<html>
    <head>
        <meta http-equiv="Content-Type" content="text/html; charset=UTF-8">
        <title>Get Time !!!</title>
    </head>
    <body>
        The time in milliseconds is: <c:out value="${TimeIs}" /> !
    </body>
</html>

Controller & Service

Our controller:
@Controller
public class MyController {

    private MyService myService;

    @Autowired
    public void setMyService(MyService myService) {
        this.myService = myService;
    }

    @RequestMapping(value = "/")
    public String home() {
        return "index";
    }

    @RequestMapping(value = "/getTime")
    public String helloWorld(Model model) {
        model.addAttribute("TimeIs", myService.getCurrentTimeInMilliseconds());
        return "getTime";
    }

}
The above, maps index.jsp to '/' user requests.

Our service and implementation:
public interface MyService {
    long getCurrentTimeInMilliseconds();
}

public class MyServiceImpl implements MyService {

    @Override
    public long getCurrentTimeInMilliseconds() {
        return System.currentTimeMillis();
    }

}

@Configuration
public class MyServicesConfiguration {

    private MyService myService = new MyServiceImpl();

    @Bean
    public MyService getMyService() {
        return myService;
    }

}

Dependencies

<dependencies>
    <dependency>
        <groupId>org.springframework</groupId>
        <artifactId>spring-context</artifactId>
        <version>${spring.version}</version>
    </dependency>
    <dependency>
        <groupId>org.springframework</groupId>
        <artifactId>spring-webmvc</artifactId>
        <version>${spring.version}</version>
    </dependency>
    <dependency>
        <groupId>javax.servlet</groupId>
        <artifactId>servlet-api</artifactId>
        <version>2.5</version>
        <scope>provided</scope>
    </dependency>
    <dependency>
        <groupId>cglib</groupId>
        <artifactId>cglib-nodep</artifactId>
        <version>2.2</version>
        </dependency>
    <dependency>
        <groupId>javax.servlet</groupId>
        <artifactId>jstl</artifactId>
        <version>1.2</version>
    </dependency>
</dependencies>

Running The Example

After compiling the project, one can run it using the maven tomcat:run goal. Then, browse:

  http://localhost:8383/spring-mvc-with-annotations/getTime

It will display something similar to:

  The time in milliseconds is: 1346261454171 !

For the same example with Spring Security, click here • More Spring related posts here.

Sunday, 26 August 2012

Simple Spring Web MVC Application (using Maven)

Spring Web MVC Application Example
This example is nothing more than the implementation of the Green Beans: Getting Started with Spring MVC example.

It is available from Github in the Simple-Spring-Web-Application directory.

This example can be started with the maven tomcat:run goal.

Then open http://localhost:8282/baremvc/.

For the compare example: http://localhost:8282/baremvc/compare?input1=Pit&input2=pat.

Spring MVC Features Showcase

For a demonstration of the Spring 3+ MVC features, there is a complete project described here.

It can be started with tomcat:run too.