Showing posts with label Web Application Development. Show all posts

Tuesday, 2 April 2013

Creating A Customized Spring User & Persistence

This post explains how to create a customized Spring user and persistence mechanism for authentication. The code is available at GitHub in the Spring-MVC-Customized-User directory.

Things To Take Into Consideration

Before creating a customized user, we need to remind what a user is in Spring. We know from here that a user is an implementation of the UserDetails interface. Spring security also requires a loading mechanism, as an implementation of the UserDetailsService interface. To keep this example simple, we are not going to implement login/logout or other security features.

The UserDetails interface is a bit incomplete in order to define a user in a real application. It defines getters and no setters. It is not a big deal, but the real pain is that the username (a string) is considered as 'the' key. Most software developers will prefer a long id.

To solve these issues, we define a PracticalUser interface:
public interface PracticalUserDetails
        extends UserDetails, CredentialsContainer {

    long getId();

    void setPassword(String password);

    void setAccountExpired(boolean b);

    void setAccountLocked(boolean b);

    void setCredentialsExpired(boolean b);

    void setEnabled(boolean b);

    void setAuthorities(
        Collection<? extends GrantedAuthority> authorities);

}
Typically, one would use JPA annotations on the implementation bean and save it in a database in a real application. However, for this example, the DAO will register users in an in-memory map as described further.

The UserDetailsService interface does not provide a get user per name or id, which is necessary for an administrator (for example). More, it does not allow to retrieve all existing users' id and name, or to update or insert users, or even to delete them.

Therefore, we create a PracticalUserDetailsService interface to solve these issues:
public interface PracticalUserDetailsService
        extends UserDetailsService {

    Set<PracticalUserDetailsDAO.UserIdentifiers> getUsers();

    void deleteUser(long id);

    void upsertUser(PracticalUserDetails user);

    PracticalUserDetails getUser(long id);

    PracticalUserDetails getUser(String username);

}
The corresponding implementation is called PracticalUserDetailsServiceInMemory for this example.

In-Memory DAO

To keep this example simple, we define a simple PracticalUserDetailsDAO:
public interface PracticalUserDetailsDAO<U extends PracticalUserDetails> {

    void create(U user);

    boolean contains(U user);

    U read(String username);

    U read(long id);

    void update(U user);

    void delete(String username);

    void delete(long id);

    interface UserIdentifiers {
        long getId();
        String getUsername();
    }

    Set<UserIdentifiers> getUsers();

}
We also define a special user id and name identifier interface to retrieve the set of existing user data, without returning all users. Our implementation of PracticalUserDetailsDAO is PracticalUserDetailsDAOInMemory.

In a real implementation, using a JPA Repository is more appropriate.

Configuration

In the security.xml file, we define our practical user detail service (it will be registered in the authentication manager) and the in-memory DAO bean:
<beans:beans xmlns="http://www.springframework.org/schema/security"
  xmlns:beans="http://www.springframework.org/schema/beans"
  xmlns:xsi="http://www.w3.org/2001/XMLSchema-instance"
  xsi:schemaLocation="http://www.springframework.org/schema/beans
    http://www.springframework.org/schema/beans/spring-beans-3.0.xsd
    http://www.springframework.org/schema/security
    http://www.springframework.org/schema/security/spring-security-3.1.xsd">

    <http auto-config="true">
    </http>

    <authentication-manager alias="authenticationManager">
        <authentication-provider user-service-ref='practicalUserDetailsServiceInMemory' />
    </authentication-manager>

    <beans:bean id="pud"
        class="com.jverstry.DAO.PracticalUserDetailsDAOInMemory">
    </beans:bean>

</beans:beans>

The JSP Pages

We use two pages. The main page displays registered users (together with a delete link) and registration form:


The second page is displayed when the Create User button is clicked to check the name and the password:


The Controller

The controller is used to check the username and password:
@Controller
public class MyController {

    @Autowired
    private PracticalUserDetailsServiceInMemory pudm;

    @RequestMapping(value = "/")
    public ModelAndView index() {

        ModelAndView result = new ModelAndView("index");

        result.addObject("users", this.pudm.getUsers());

        return result;

    }

    @RequestMapping(value = "/delete/{id}")
    public String delete(@PathVariable(value="id") String id) {

        this.pudm.deleteUser(Long.parseLong(id));

        return "redirect:/";

    }

    @RequestMapping(value = "/create")
    @SuppressWarnings("AssignmentToMethodParameter")
    public ModelAndView add(
            @RequestParam(value="name")
            String name,
            @RequestParam(value="password")
            String password) {

        name = StringUtils.replace(name, " ", "");
        password = StringUtils.replace(password, " ", "");

        String errorMsg = "";

        if ( name.length() == 0 ) {
            errorMsg += "Name is empty ";
        }

        if ( password.length() == 0 ) {
            errorMsg += "Password is empty ";
        }

        if ( errorMsg.isEmpty() ) {
            this.pudm.upsertUser(new PracticalUserDetailsImpl(name, password));
        }

        ModelAndView result = new ModelAndView("create");

        result.addObject("errorMsg", errorMsg);
        result.addObject("username", name);

        return result;

    }

}

Running The Example

One can run it using the maven tomcat:run goal. Then, browse:

  http://localhost:9191/spring-mvc-customized-user/

More Spring related posts here.

Execute Spring ACL SQL Script In Memory

This post describes how to execute the Spring ACL script to create ACL tables in an in-memory HSQL database instance. The code is available at GitHub in the Execute-ACL-SQL-Scripts-In-Memory directory.

In-Memory DataSource

We are using a configuration classe implementing the DisposableBean interface to shut down the created HSQL embedded database nicely.
@Configuration
public class InMemoryDataSource implements DisposableBean {

    private EmbeddedDatabase ed;

    @Bean(name="hsqlInMemory")
    public EmbeddedDatabase hsqlInMemory() {

        if ( this.ed == null ) {

            EmbeddedDatabaseBuilder builder = new EmbeddedDatabaseBuilder();

            this.ed = builder.setType(EmbeddedDatabaseType.HSQL)
                .addScript("aclSchema.sql").build();

        }

        return this.ed;

    }

    @Override
    public void destroy() {

        if ( this.ed != null ) {
            this.ed.shutdown();
        }

    }

}
When creating the database, we also have the aclSchema.sql script executed. It must be located at the root of the resource directory:


The content of the script is taken from the Spring documentation appendix.

Checking Table Creation

We extract the list table of tables in the controller. Technically speaking, we should do this at the service/DAO level, but for the sake of this example, we'll keep it simple:
@Controller
public class MyController {

    @Autowired
    EmbeddedDatabase hsqlInMemory;

    @RequestMapping(value = "/")
    public ModelAndView home() {

        ModelAndView result = new ModelAndView("index");

        ArrayList<String> tables = new ArrayList<String>();

        JdbcTemplate tplate = new JdbcTemplate(hsqlInMemory);

        SqlRowSet retr = tplate.queryForRowSet(
            "SELECT TABLE_NAME FROM INFORMATION_SCHEMA.TABLES");

        while (retr.next()) {
            tables.add(retr.getString(1));
        }

        result.addObject("tables", tables);

        return result;

    }

}

Running The Example

One can run it using the maven tomcat:run goal. Then, browse:

  http://localhost:8585/execute-acl-sql-scripts-in-memory/

We find the tables we have created:


More Spring related posts here.

Thursday, 7 March 2013

Spring JpaRepository Example (In-Memory)

This post describes a simple Spring JpaRepository example using an in memory HSQL database. The code example is available from GitHub in the Spring-JpaRepository directory. It is based on the Spring-MVC-With-Annotations example and information available here.

JPA Repository

We implement a dummy bean for this example:
@Entity
@AutoProperty
public class SomeItem {

    @Id
    @GeneratedValue(strategy=GenerationType.AUTO)
    private long Id;

    private String someText;

    /* ...Setters & Getters */

}
and the corresponding JpaRepository:
@Transactional
public interface SomeItemRepository
        extends JpaRepository<SomeItem, Long> {

}

Service & Controller

Next, we implement a service where our repository will be injected. We also populate the repository with dummy data:
@Service
@Repository
public class SomeItemService {

    @Autowired
    private SomeItemRepository someItemRepository;

    @PostConstruct
    @Transactional
    public void populate() {

        SomeItem si = new SomeItem();
        si.setSomeText("aaa");
        someItemRepository.saveAndFlush(si);

        si = new SomeItem();
        si.setSomeText("bbb");
        someItemRepository.saveAndFlush(si);

        si = new SomeItem();
        si.setSomeText("ccc");
        someItemRepository.saveAndFlush(si);

    }

    @Transactional(readOnly=true)
    public List<SomeItem> getAll() {

        return someItemRepository.findAll();

    }

    @SuppressWarnings("AssignmentToMethodParameter")
    @Transactional
    public SomeItem saveAndFlush(SomeItem si) {

        if ( si != null ) {
            si = someItemRepository.saveAndFlush(si);
        }

        return si;

    }

    @Transactional
    public void delete(long id) {

        someItemRepository.delete(id);

    }

}
and a controller:
@Controller
public class MyController {

    @Autowired
    private SomeItemService someItemService;

    @RequestMapping(value = "/")
    public ModelAndView index() {

        ModelAndView result = new ModelAndView("index");
        result.addObject("items", this.someItemService.getAll());

        return result;

    }

    @RequestMapping(value = "/delete/{id}")
    public String delete(
        @PathVariable(value="id") String id) {

        this.someItemService.delete(Long.parseLong(id));

        return "redirect:/";

    }

    @RequestMapping(value = "/create")
    @SuppressWarnings("AssignmentToMethodParameter")
    public String add() {

        SomeItem si = new SomeItem();
        si.setSomeText("Time is: " + System.currentTimeMillis());

        this.someItemService.saveAndFlush(si);

        return "redirect:/";

    }

}

JPA Configuration

On top of creating an entity manager based on an in-memeory instance of HSQL database, we enable JPA repositories with the @EnableJpaRepositories annotation:
@Configuration
@EnableJpaRepositories(basePackages={"com.jverstry"})
@EnableTransactionManagement
public class JpaConfig implements DisposableBean {

    private EmbeddedDatabase ed;

    @Bean(name="hsqlInMemory")
    public EmbeddedDatabase hsqlInMemory() {

        if ( this.ed == null ) {
            EmbeddedDatabaseBuilder builder = new EmbeddedDatabaseBuilder();
            this.ed = builder.setType(EmbeddedDatabaseType.HSQL).build();
        }

        return this.ed;

    }

    @Bean
    public LocalContainerEntityManagerFactoryBean entityManagerFactory(){

        LocalContainerEntityManagerFactoryBean lcemfb
            = new LocalContainerEntityManagerFactoryBean();

        lcemfb.setDataSource(this.hsqlInMemory());
        lcemfb.setPackagesToScan(new String[] {"com.jverstry"});

        lcemfb.setPersistenceUnitName("MyPU");

        HibernateJpaVendorAdapter va = new HibernateJpaVendorAdapter();
        lcemfb.setJpaVendorAdapter(va);

        Properties ps = new Properties();
        ps.put("hibernate.dialect", "org.hibernate.dialect.HSQLDialect");
        ps.put("hibernate.hbm2ddl.auto", "create");
        lcemfb.setJpaProperties(ps);

        lcemfb.afterPropertiesSet();

        return lcemfb;

    }

    @Bean
    public PlatformTransactionManager transactionManager(){

        JpaTransactionManager tm = new JpaTransactionManager();

        tm.setEntityManagerFactory(
            this.entityManagerFactory().getObject() );

        return tm;

    }

    @Bean
    public PersistenceExceptionTranslationPostProcessor exceptionTranslation(){
        return new PersistenceExceptionTranslationPostProcessor();
    }

    @Override
    public void destroy() {

        if ( this.ed != null ) {
            this.ed.shutdown();
        }

    }

}

The JSP Page

We create a simple page to list existing items with a delete link, and the possibility to create new items:

 Running The Example

One can run it using the maven tomcat:run goal. Then, browse:

  http://localhost:9191/spring-jparepository/

More Spring related posts here.

Tuesday, 29 January 2013

Anatomy Of The Default OpenShift Spring Web Application

OpenShift lets users create different kind of applications by using cartridges, including Spring applications running on JBoss EAP6. As confirmed by Kazaag on StackOverflow, porting a Spring application developed on Tomcat 7 on JBoss EAP6 should not be a hassle, especially if Tomcat specific features are not used in the application.

The purpose of this post is to discuss the default Spring application offered by OpenShift. On top of typical Spring files, a couple of jboss files are included:
  • jboss-as-spring-mvc-context.xml - This is the equivalent of the servlet-context.xml file in a simple Spring Web MVC application without annotations.
  • jboss-deployment-structure.xml - This file is about solving classloader issues, which is not typical of Spring applications. Thanks to Thomas' answer on StackOverflow, we know this file is not necessary in most cases.
  • spring-quickstart-ds.xml - Registers IronJacamar, JBoss' JCA implementation. One could use Spring's implementation instead.
  • infrastructure.xml - Registers the entity manager factory in JNDI, and enables the JTA transaction management.
Remaining files are typical of Spring MVC applications without annotations.


What Is JNDI, SPI, CCI, LDAP And JCA?

JNDI stands for Java Naming and Directory Interface. It is an API to providing access to a directory service, that is, a service mapping name (strings) with objects, reference to remote objects or simple data. This is called binding. The set of bindings is called the context. Applications use the JNDI interface to access resources.

To put it very simply, it is like a hashmap with a String key and Object values representing resources on the web. Often, these resources are organized according to a hierarchy in directory services. Levels are defined with separators (for example '.' for DNS, ',' for LDAP). This is a naming convention. Each context has its naming convention.

SPI stands for Service Provider Interface. In other words, these are APIs for services. JNDI specifies a SPI to implement directory services. Objects stored in directories can have attributes (id and value). CRUD operations can be performed on these attributes.

Rather than providing a name, one can also search for objects according to their attributes, if the directory allows it. The information provided by user applications is called a search filter.

What Issues Does JNDI Solve?

Without JNDI, the location or access information of remote resources would have to be hard-coded in applications or made available in a configuration. Maintaining this information is quite tedious and error prone.

If a resources has been relocated on another server, with another IP address, for example, all applications using this resource would have to be updated with this new information. With JNDI, this is not necessary. Only the corresponding resource binding has to be updated. Applications can still access it with its name and the relocation is transparent.

Another common use is when applications are moved from a development environment, to a testing environment and finally to production. At each stage, one may want to use a different database for development, testing and production. In each context, one can make a different binding to each database. The application does not need to be udpated.

What is LDAP?

LDAP stands for Lightweight Directory Application Protocol. It is often used as a directory service in JNDI. Today, companies set LDAP server dedicated to responding to JNDI requests. A common use is to maintain a list of company employees, together with their emails and access credentials to miscellaneous application.

By centralizing this information, each application does not have to store multiple copies of employees information in their own databases, which is easier to maintain and less prone to errors and incoherencies.

What About JCA and CCI?

JCA stands for Java EE Connector Architecture. It is a Java technology helping application servers and their applications connect to other information systems, by providing them with connections to these. JCA defines its own SPI for the connector service. CCI stands for Common Client Interface. It is defined as part of JCA. It is the API user applications use to access JCA connection services.

JCA helps integrating information systems developed separately. Typically, instead of using JDBC to access databases, which is more or less equivalent to hard-coding configurations, a user application can use JCA to connect to these databases (or information systems). The JCA instance can be registered in the JDNI directory and retrieved by the user applications too.

What About Web Applications?

Typically, web applications run in containers called application servers. Web applications can create their own JNDI service to store objects, but they can also retrieve these from the container itself by using their corresponding name. In this case, the resource (often a database) is configured at the container level.

Friday, 11 January 2013

How To Create A Focussable Image Button?

Surprizingly, it has not been that easy to create a focussable image button. There is a lot of incongruent information available out there. Hence, this post. The solution is quite simple when you know it:
<html>
<head></head>
  <body>
    <script>
      function doSomething() {
        alert('Hello!'); 
      }
    </script>
    <input type="image" tabindex="0" onclick="doSomething()"
      src="http://upload.wikimedia.org/wikipedia/commons/thumb/0/0c/White_and_yellow_flower.JPG/320px-White_and_yellow_flower.JPG" 
    />
    </body>
</html>
The JSFiddle is available here.

Sunday, 18 November 2012

Spring Internationalization Example (with Annotations)

Spring InternationalizationThis post describes how to implement message internationalization in Spring. The code example is available from GitHub in the Spring-MVC-Internationalization directory. It is based on the Spring MVC with annotations example.

Internationalization

We define two resource bundles (setA and setB) containing string translations for German, French and English. These are created in the src/main/resources maven directory.

Configuration

We need to create:
  • a ResourceBundleMessageSource bean to load the string translations
  • a LocaleChangeInterceptor bean which will intercept requests and extract a parameter value (if available) to detect language changes
  • a SessionLocaleResolver bean to store the user's locale preference in the session
  • to register the LocaleChangeInterceptor in the interceptor registry
 We extend our web configuration:
@EnableWebMvc
@Configuration
@ComponentScan(basePackages = "com.jverstry")
public class WebConfig extends WebMvcConfigurerAdapter {

    ...

    @Bean
    public MessageSource messageSource() {
        ResourceBundleMessageSource result
            = new ResourceBundleMessageSource();

        String[] basenames = {
            "i18n.setA.setA",
            "i18n.setB.setB"
        };

        result.setBasenames(basenames);

        return result;

    }

    @Bean
    public LocaleChangeInterceptor localeChangeInterceptor() {

        LocaleChangeInterceptor result = new LocaleChangeInterceptor();
        result.setParamName("lang");

        return result;

    }

    @Bean
    public LocaleResolver localeResolver() {

        SessionLocaleResolver result = new SessionLocaleResolver();
        result.setDefaultLocale(Locale.ENGLISH);

        return result;

    }

    @Override
    public void addInterceptors(InterceptorRegistry registry) {
        registry.addInterceptor(localeChangeInterceptor());
    }

}

Controller

We simply our controller a lot:
@Controller
public class MyController {

    @RequestMapping(value = "/")
    public String home() {
        return "index";
    }

}

JSP Page

We only keep the index.jsp page, where we add links to change the language of displayed messages:
<%@ page contentType="text/html;charset=UTF-8" %>
<%@ taglib prefix="c" uri="http://java.sun.com/jsp/jstl/core" %>
<%@ taglib uri="http://www.springframework.org/tags" prefix="spring" %>
<!doctype html>
<html lang="en">
<head>
  <title>Welcome To Spring MVC Internationalization !!!</title>
</head>
<body>
  <h1>Spring MVC Internationalization !!!</h1>
  <p>Choose:
      <a href="<c:url value='?lang=en'/>">English</a>
      | <a href="<c:url value='?lang=fr'/>">French</a>
      | <a href="<c:url value='?lang=de'/>">German</a>
  </p>

  <p>Greetings: <spring:message code="greetings" text="missing" /></p>
  <p>Text 2: <spring:message code="text2" text="missing" /></p>
  <p>Current: <c:out value="${pageContext.response.locale}" /></p>
</body>
</html>

Running The Example

Once compiled, the example can be run with mvn tomcat:run. Then, browse:

  http://localhost:8383/spring-mvc-internationalization/

The main page will be displayed:


If you click on German, the German text is displayed:


More Spring related posts here.

Spring Bean XML To Annotation Configuration

Here is an example of converting an XML based bean configuration to a annotation based configuration.

Assuming an XML files contain the following:
<bean id="localeChangeInterceptor"
    class="org.springframework.web.servlet.i18n.LocaleChangeInterceptor">
    <property name="paramName" value="lang" />
</bean>
<bean id="handlerMapping"
    class="org.springframework.web.servlet.mvc.annotation.DefaultAnnotationHandlerMapping">
   <property name="interceptors">
       <ref bean="localeChangeInterceptor" />
   </property>
</bean>
The second beans refers to the first one for initialization.

The corresponding Java with annotation configuration is:
@Configuration
public class MyConfig {

    // ...

    @Bean
    public LocaleChangeInterceptor localeChangeInterceptor() {

        LocaleChangeInterceptor result
            = new LocaleChangeInterceptor();

        result.setParamName("lang");

        return result;

    }

    @Bean
    public DefaultAnnotationHandlerMapping handlerMapping() {

        DefaultAnnotationHandlerMapping result
            = new DefaultAnnotationHandlerMapping();

        Object[] interceptors = {
            localeChangeInterceptor()
        };

        result.setInterceptors(interceptors);

        return result;

    }

}

More Spring related posts here.

Sunday, 11 November 2012

Introduction To Spring JPA Data Features

This post is a quick introduction to Spring JPA Data's (SJD) features. This Spring module is built on top of the Spring Data Commons module, which is a prerequisite read in order to understand this post.

Features

This module offers several features:
  • JpaRepository<T, ID extends Serializable> - This interface extends the CrudRepository and PageAndSortingRepository interfaces of the Spring Data Commons module. It offers a couple of extra flush, find all and delete operations. See here for an operational example.
  • JPA Query Methods - This is a powerful mechanism allowing Spring to create queries from method names in classes/interfaces implementing Repository. For example: List<Invoice> findByStartDateAfter(Date date); is automatically translated into select i from Invoice i where u.startDate > ?1.
  • @Query - Queries can be associated to methods in Repository classes/interfaces. For example, a method can be annotated with @Query("select i from Invoice i where u.startDate > ?1")
  • @Modifying - This annotation can be used in combination with @Query to indicate that the corresponding query will perform modifications. Hence, any outdated entities are cleared first.
  • @Lock - This annotation is used to set the lock mode type (none, optimistic, pessimistic, etc...) for a given @Query.
  • JpaSpecificationExecutor and Specification - This interface adds a couple find and count of methods to repository classes/interfaces. All, have a Specification  parameter, which add predicates (i.e., where clauses) to corresponding queries.
  • Auditable, AbstractPersistable and AbstractAuaditable - The Auditable interface allows one to track modifications made to an entity (creation, last modification...). The AbstractPersistable and AbstractAuditable are abstract class facilities avoiding the boilerplate code.
  • MergingPersistenceUnitManager - If a developer decides to modularize his/her application, he/she may still want to use a unique persistence unit, even though they are declared in separate XML file. The MergingPersistenceUnitManager solves this issue.
At last, to enable JPA repositories, the:

    @EnableJpaRepositories("com.my.repositories")

should be set on a Java @Configuration class.

More Spring related posts here.

Introduction To Spring Data Commons Features

This post is a quick introduction to Spring Data Common's (SDC) features.

Features

This Spring module provides a set of interfaces to manipulate data in repositories:
  • Repository - This is a marker interface indicating which object are going to access the repository.
  • CrudRepository<T, ID extends Serializable> - This interface extends Repository and provides a set of CRUD (Create, Read, Update, Delete) methods to manipulate T objects having ID as a key.
  • PageAndSortingRepository<T, ID extends Serializable> - This interface extends CrudRepository and provides method to fetch T objects in a sorted way or using pages.
  • Pageable & PageRequest - The Pageable interface is implemented by PageRequest. Page requests are created to indicate which page and page sizes should be used to fetch objects from the PageAndSortingRepository interface.
  • Page<T> - This interface contains the fetched objects returned for a given page request.
The above repository interfaces can expose too many methods for some developers. For example, one may not be comfortable with the idea of exposing write methods. The solution is to create your own customized repository interface and annotate it with:

    @RepositoryDefinition(
        domainClass=MyClass.class,
        idClass=MyClassID.class)

Then, copy the the repository methods you want to expose in this customized interface and Spring will deal with them.

There are situations where developers want to implement their own repository interfaces by extending the repository interfaces available in SDC. However, these interfaces should not be instantiated in their applications. To prevent this, they can use the @NoRepositoryBean on these customized interfaces.

More Spring related posts here.

The Authenticated User Concept In Spring Security

A user, in the Spring Security context, is an instance of a class implementing the UserDetails interface. One can use it to check whether:
  • the user account is expired or locked
  • the user is enabled or not
  • credentials are expired or not
As a reminder, authentication requests are managed by an authentication manager delegating these to authentication providers. The laters can be used to authenticate authentication requests.

By default, Spring configures a DaoAuthenticationProvider instance, and registers it in the default authentication manager. The main purpose of this provider is to let software developers choose the way they want to store UserDetails by setting an object implementing UserDetailsService. Such services have one function: load a user's details from its name. That's it! It can be a database, an in-memory database, etc...

If you want to implement your own UserDetailsService, Marc Serrano has provided a detailed example using a JPA Repository which eliminates a lot of the boiler-plate code. Such repositories are part of the Spring JPA Data features.

To implement a customized user and corresponding persistence, see the example available here.

More Spring related posts here.

Thursday, 8 November 2012

Spring MVC REST Calls With HTTP Only

This post describes how to perform REST calls to a Spring MVC application using HTTP only. This example is a variation of the Spring MVC REST Calls With Ajax example. The code is available on GitHub in the Spring-REST-With-HTML-Only directory.

Web.xml

We need to add the HiddenHttpMethodFilter to our web.xml. It searches HTML form PUTs for a _method parameter. If the corresponding value is GET, PUT, POST or DELETE, the call is transformed into a REST call before it is transmitted to the controllers:
...
<servlet-mapping>
    <servlet-name>MyServlet</servlet-name>
    <url-pattern>/</url-pattern>
</servlet-mapping>

<filter>
    <filter-name>hiddenHttpMethodFilter</filter-name>
    <filter-class>org.springframework.web.filter.HiddenHttpMethodFilter</filter-class>
</filter>

<filter-mapping>
    <filter-name>hiddenHttpMethodFilter</filter-name>
    <servlet-name>MyServlet</servlet-name>
</filter-mapping>
...

Main Page

We replace the buttons by HTML post forms:
<%@page contentType="text/html" pageEncoding="UTF-8"%>
<%@ taglib prefix="c" uri="http://java.sun.com/jsp/jstl/core" %>
<!doctype html>
<html lang="en">
<head>
  <meta http-equiv="Content-Type" content="text/html;" charset=UTF-8">
  <title>Welcome To REST With HTML Only !!!</title>
</head>
<body>
    <h1>Welcome To REST With HTML Only !!!</h1>
    <form action="<c:url value='/MyData/123466/'/>"
          method="post" >
        <input type="hidden" name="_method" value="GET">
        <input type="submit" value="GET">
    </form>
    <form action="<c:url value='/MyData'/>"
          method="post" >
        <input type="hidden" name="time" value="555555">
        <input type="hidden" name="message" value="User PUT call !!!">
        <input type="hidden" name="_method" value="PUT">
        <input type="submit" value="PUT">
    </form>
    <form action="<c:url value='/MyData'/>"
          method="post" >
        <input type="submit" value="POST">
    </form>
    <form action="<c:url value='/MyData/654321'/>"
          method="post" >
        <input type="hidden" name="_method" value="DELETE">
        <input type="submit" value="DELETE">
    </form>
</body>
</html>

Controller

We need to modify our controller for PUT calls:
@Controller
@RequestMapping(value = "/MyData")
public class MyRESTController {

    @RequestMapping(value="/{time}", method = RequestMethod.GET)
    public @ResponseBody MyData getMyData(
            @PathVariable long time) {

        return new MyData(time, "REST GET Call !!!");
    }

    @RequestMapping(method = RequestMethod.PUT)
    public @ResponseBody MyData putMyData(
            @RequestParam("time") long time,
            @RequestParam("message") String message) {

        return new MyData(time, message);
    }

    @RequestMapping(method = RequestMethod.POST)
    public @ResponseBody MyData postMyData() {
        return new MyData(
            System.currentTimeMillis(), "REST POST Call !!!");
    }

    @RequestMapping(value="/{time}", method = RequestMethod.DELETE)
    public @ResponseBody MyData deleteMyData(
            @PathVariable long time) {

        return new MyData(time, "REST DELETE Call !!!");
    }

}

Running The Example

Once compiled, the example can be run with mvn tomcat:run. Then, browse:

  http://localhost:8585/spring-rest-with-html-only

The main page will be displayed:

Spring MVC REST Calls With HTML Only


If you click on a button, the corresponding JSON will be displayed:

Spring MVC With HTML Only JSON
More Spring related posts here.

Spring MVC REST Calls From Java

Sometimes, web applications running on servers need to access REST resources located on other servers. From a REST perspective, the physical server act as a logical REST client. This example describes how to proceed. It is based on the Spring MVC REST Calls With Ajax example. The code is available on GitHub in the Spring-Server-Side-REST-Call directory.

Controller

To simulate a remote server, we create a fake remote controller:
@Controller
@RequestMapping(value = "/MyRemoteData")
public class MyRemoteController {

    @RequestMapping(value="/{time}", method = RequestMethod.GET)
    public @ResponseBody MyRemoteData getMyRemoteData(
            @PathVariable long time) {

        return new MyRemoteData(
            "My remote data called at: " + time + " !!!");
    }

}
It return a MyRemoteData object as a JSON:
public class MyRemoteData {

    private String data = "";

    public MyRemoteData() { }

    public MyRemoteData(String message) {
       this.data = message;
    }

    // Setter & Getters

}
We simplify our existing controller to a simple GET. It uses Spring's RestTemplate to make a REST Http GET call to fetch remote data from our 'remote' server:
@Controller
@RequestMapping(value = "/MyData")
public class MyRESTController {

    @RequestMapping(value="/{time}", method = RequestMethod.GET)
    public @ResponseBody MyData getMyData(
            @PathVariable long time) {

        RestTemplate restTemplate = new RestTemplate();

        String remote = "http://localhost:8585/spring-server-side-rest-call/"
            + "MyRemoteData/" + System.currentTimeMillis();

        MyRemoteData mrd = restTemplate.getForObject(
            remote, MyRemoteData.class);

        return new MyData(System.currentTimeMillis(), mrd.getData());

    }

}

Main Page

We simplify our main page and only keep our GET button:
<%@page contentType="text/html" pageEncoding="UTF-8"%>
<%@ taglib prefix="c" uri="http://java.sun.com/jsp/jstl/core" %>
<!doctype html>
<html lang="en">
<head>
  <meta http-equiv="Content-Type" content="text/html;" charset=UTF-8">
  <script type="text/javascript"
    src="https://ajax.googleapis.com/ajax/libs/jquery/1.8.2/jquery.min.js">
  </script>
  <script type="text/javascript"
    src="<c:url value='/resources/js/SpringServerSideRestCall.js'/>">
  </script>
  <title>Welcome To REST With Java !!!</title>
</head>
<body>
  <h1>Welcome To REST With Java !!!</h1>
  <button type="button" onclick="RestGet()">GET</button>
</body>
</html>
Ditto for our javascript:
var prefix = "/spring-server-side-rest-call";

var RestGet = function() {

    $.ajax({
        type: 'GET',
        url:  prefix + "/MyData/" + Date.now(),
        dataType: 'json',
        async: true,
        success: function(result) {
            alert("At " + result.time
                + ": " + result.message);
        },
        error: function(jqXHR, textStatus, errorThrown) {
            alert(jqXHR.status + " " + jqXHR.responseText);
        }
    });

}

Running The Example

Once compiled, the example can be run with mvn tomcat:run. Then, browse:

  http://localhost:8585/spring-server-side-rest-call/

The main page will be displayed:

Spring REST Calls From Java

If you click on get, a pop-up is displayed:


More Spring related posts here.
Wednesday, 7 November 2012

Spring MVC REST Calls With Ajax

This post provides a simple example of REST calls to a Spring MVC web application. It is based on the Serving Static Resources With Spring MVC and Fetching JSON With Ajax In Spring MVC Context example. The code is available on GitHub in the Spring-REST-With-Ajax directory.

Main Page

Our main page contains four buttons linked to Javascript functions performing Ajax calls:
...
<body>
<h1>Welcome To REST With Ajax !!!</h1>
<button type="button" onclick="RestGet()">GET</button>
<button type="button" onclick="RestPut()">PUT</button>
<button type="button" onclick="RestPost()">POST</button>
<button type="button" onclick="RestDelete()">DELETE</button>
</body>
...

Javascript

Our Javascript file contains the four functions:
var prefix = "/spring-rest-with-ajax";

var RestGet = function() {
        $.ajax({
        type: 'GET',
        url:  prefix + "/MyData/" + Date.now(),
        dataType: 'json',
        async: true,
        success: function(result) {
            alert("At " + result.time
                + ": " + result.message);
        },
        error: function(jqXHR, textStatus, errorThrown) {
            alert(jqXHR.status + " " + jqXHR.responseText);
        }
   });
}

var RestPut = function() {

    var JSONObject= {
        "time": Date.now(),
        "message": "User PUT call !!!"
    };
 
    $.ajax({
        type: 'PUT',
        url:  prefix + "/MyData",
        contentType: "application/json; charset=utf-8",
        data: JSON.stringify(JSONObject),
        dataType: 'json',
        async: true,
        success: function(result) {
            alert("At " + result.time
                + ": " + result.message);
        },
        error: function(jqXHR, textStatus, errorThrown) {
            alert(jqXHR.status + " " + jqXHR.responseText);
        }
    });
}

var RestPost = function() {
        $.ajax({
        type: 'POST',
        url:  prefix + "/MyData",
        dataType: 'json',
        async: true,
        success: function(result) {
            alert("At " + result.time
                + ": " + result.message);
        },
        error: function(jqXHR, textStatus, errorThrown) {
            alert(jqXHR.status + " " + jqXHR.responseText);
        }
    });
}

var RestDelete = function() {
        $.ajax({
        type: 'DELETE',
        url:  prefix + "/MyData/" + Date.now(),
        dataType: 'json',
        async: true,
        success: function(result) {
            alert("At " + result.time
                + ": " + result.message);
        },
        error: function(jqXHR, textStatus, errorThrown) {
            alert(jqXHR.status + " " + jqXHR.responseText);
        }
    });
}

Controller

Our controller captures the REST calls and returns a JSON. In a real applications, one would perform CRUD operations rather than returning JSONs:
@Controller
@RequestMapping(value = "/MyData")
public class MyRESTController {

    @RequestMapping(value="/{time}", method = RequestMethod.GET)
    public @ResponseBody MyData getMyData(
            @PathVariable long time) {
  
        return new MyData(time, "REST GET Call !!!");
    }
 
    @RequestMapping(method = RequestMethod.PUT)
    public @ResponseBody MyData putMyData(
            @RequestBody MyData md) {
  
        return md;
    }
 
    @RequestMapping(method = RequestMethod.POST)
    public @ResponseBody MyData postMyData() {
 
        return new MyData(System.currentTimeMillis(),
            "REST POST Call !!!");
    }

    @RequestMapping(value="/{time}", method = RequestMethod.DELETE)
    public @ResponseBody MyData deleteMyData(
            @PathVariable long time) {
  
        return new MyData(time, "REST DELETE Call !!!");
    }
}

Running The Example

Once compiled, the example can be run with mvn tomcat:run. Then, browse:

  http://localhost:8585/spring-rest-with-ajax/

The main page will be displayed:


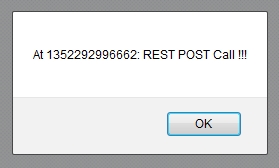
If you click on any button, a pop-up will be displayed:


See here for more about REST • More Spring related posts here.

Tuesday, 6 November 2012

Spring MVC Error Handling

This post describes the different techniques to perform error handling in Spring MVC 3. The code is available on GitHub in the Spring-MVC-Error-Handling directory. It is based on the Spring MVC With Annotations examples.

Handling Exceptions Before Spring 3

Before Spring 3, exceptions were handled with HandlerExceptionResolvers. This interface defines a single method:
ModelAndView resolveException(
  HttpServletRequest request,
  HttpServletResponse response,
  Object handler,
  Exception ex)
Notice it returns a ModelAndView object. Therefore, encountering an error meant being forwarded to a special page. However, this method is not suited for REST Ajax calls to JSONs (for example). In this case, we do not want to return a page, and we may want to return a specific HTTP status code. A solution, described further, is available.

For the sake of this example, two fake CustomizedException1 and CustomizedException2 exceptions have been created. To map customized exceptions to views, one could (and can still) use a SimpleMappingExceptionResolver:
SimpleMappingExceptionResolver getSimpleMappingExceptionResolver() {

    SimpleMappingExceptionResolver result
        = new SimpleMappingExceptionResolver();

    // Setting customized exception mappings
    Properties p = new Properties();
    p.put(CustomizedException1.class.getName(), "Errors/Exception1");
    result.setExceptionMappings(p);

    // Unmapped exceptions will be directed there
    result.setDefaultErrorView("Errors/Default");

    // Setting a default HTTP status code
    result.setDefaultStatusCode(HttpStatus.BAD_REQUEST.value());

    return result;

}
We map CustomizedException1 to the Errors/Exception1 JSP page (view). We also set a default error view for unmapped exception, namely CustomizedException2 in this example. We also set a default HTTP status code.

Here is the Exception1 JSP page, the default page is similar:
<%@page contentType="text/html" pageEncoding="UTF-8"%>
<%@ taglib prefix="c" uri="http://java.sun.com/jsp/jstl/core" %>
<!doctype html>
<html lang="en">
<head>
  <meta http-equiv="Content-Type" content="text/html;" charset=UTF-8">
  <title>Welcome To Exception I !!!</title>
</head>
<body>
    <h1>Welcome To Exception I !!!</h1>
    Exception special message:<
    ${exception.specialMsg}
    <a href="<c:url value='/'/>">Home</a>
</body>
</html>
We also create a dummy error controller to help triggering these exceptions:
@Controller
public class TriggeringErrorsController {

    @RequestMapping(value = "/throwCustomizedException1")
    public ModelAndView throwCustomizedException1(
        HttpServletRequest request,HttpServletResponse response)
            throws CustomizedException1 {

        throw new CustomizedException1(
            "Houston, we have a problem!");
    }

    @RequestMapping(value = "/throwCustomizedException2")
    public ModelAndView throwCustomizedException2(
        HttpServletRequest request,HttpServletResponse response)
            throws CustomizedException2 {

        throw new CustomizedException2(
            "Something happened on the way to heaven!");
    }

    ...

}
Before Spring 3, one would declare a SimpleMappingExceptionResolver as a @Bean in web.xml. However, we will use a HandlerExceptionResolverComposite which we will describe later.

We also configure a target page for HTTP status codes in web.xml, which is an other way to deal with issues:
<error-page>
    <error-code>404</error-code>
    <location>/WEB-INF/pages/Errors/My404.jsp</location>
</error-page>

What Is New Since Spring 3.X?

The @ResponseStatus annotation is a new mean to set a Http status code when a method is invoked. These are handled by the ResponseStatusExceptionResolver. The @ExceptionHandler annotation facilitates the handling of exceptions in Spring. Such annotations are processed by the AnnotationMethodHandlerExceptionResolver.

The following illustrates how these annotations can be used to set an HTTP status code to the response when our customized exception is triggered. The message is returned in the response's body:
@Controller
public class TriggeringErrorsController {

    ...

    @ExceptionHandler(Customized4ExceptionHandler.class)
    @ResponseStatus(value=HttpStatus.BAD_REQUEST)
    @ResponseBody
    public String handleCustomized4Exception(
        Customized4ExceptionHandler ex) {

        return ex.getSpecialMsg();

    }

    @RequestMapping(value = "/throwCustomized4ExceptionHandler")
    public ModelAndView throwCustomized4ExceptionHandler(

        HttpServletRequest request,HttpServletResponse response)
            throws Customized4ExceptionHandler {

        throw new Customized4ExceptionHandler("S.O.S !!!!");

    }

}
On the user side, if one uses an Ajax call, the error can be retrieved with the following (we are using JQuery):
$.ajax({
    type: 'GET',
    url:  prefix + "/throwCustomized4ExceptionHandler",
    async: true,
    success: function(result) {
        alert('Unexpected success !!!');
    },
    error: function(jqXHR, textStatus, errorThrown) {
        alert(jqXHR.status + " " + jqXHR.responseText);
    }
});
Some people using Ajax like to return a JSON with the error code and some message to handle exceptions. I find it overkill. A simple error number with a message keeps it simple.

Since we are using several resolvers, we need a composite resolver (as mentioned earlier):
@Configuration
public class ErrorHandling {

    ...

    @Bean
    HandlerExceptionResolverComposite getHandlerExceptionResolverComposite() {

        HandlerExceptionResolverComposite result
            = new HandlerExceptionResolverComposite();

        List<HandlerExceptionResolver> l
            = new ArrayList<HandlerExceptionResolver>();

        l.add(new AnnotationMethodHandlerExceptionResolver());
        l.add(new ResponseStatusExceptionResolver());
        l.add(getSimpleMappingExceptionResolver());
        l.add(new DefaultHandlerExceptionResolver());

        result.setExceptionResolvers(l);

        return result;

}
The DefaultHandlerExceptionResolver resolves standard Spring exceptions and translates them to corresponding HTTP status codes.

Running The Example

Once compiled, the example can be run with mvn tomcat:run. Then, browse:

  http://localhost:8585/spring-mvc-error-handling/

The main page will look like this:

Spring MVC Error Handling

If you click on the Exception 1 link, the following page will display:

Spring MVC Exception Handling

If you click on the Exception 2 link, the following page will display:


If you click on the Exception Handler button, a pop-up will be displayed:

Spring MVC Exception Handling Pop-Up

These techniques are enough to cover error handling in Spring.

More Spring related posts here.

Sunday, 4 November 2012

Fetching JSON With Ajax In Spring MVC Context

This post explains how to fetch a JSON using Ajax from a Spring MVC web application. It is based on the Spring MVC With Annotations and Serving Static Resources With Spring MVC examples. The code is available on GitHub in the Spring-Fetching-JSON-With-Ajax directory.

Main Index Page

We use a simple index.jsp page, where we set a button that fetches a JSON, and a <div> where the result will be displayed:
<%@page contentType="text/html" pageEncoding="UTF-8"%>
<%@ taglib prefix="c" uri="http://java.sun.com/jsp/jstl/core" %>
<!doctype html>
<html lang="en">
<head>
  <meta http-equiv="Content-Type" content="text/html;" charset=UTF-8">
  <script type="text/javascript"
    src="https://ajax.googleapis.com/ajax/libs/jquery/1.8.2/jquery.min.js">
  </script>
  <script type="text/javascript"
    src="<c:url value='/resources/js/FetchingJsonWithAjax.js'/>">
  </script>
  <title>Welcome To Fetching JSON With Ajax !!!</title>
</head>
<body>
    <h1>Fetching JSON With Ajax !!!</h1>
    <div id="theJson"></div>
    <button type="button" onclick="fetch_json()">
        Fetch JSON
    </button>
</body>
</html>

Javascript

On the button, we attach the fetch_json() Javascript method, which is called when the button is clicked:
var fetch_json = function() {

    $.ajax({
        type: 'GET',
        url:  "/spring-fetching-json-with-ajax/getJSON",
        dataType: 'json',
        async: true,
        success: function(result) {

            var tmp = "Fetch time is: " + result.milliTime + " !"
               + "and the JSON is:"
               + JSON.stringify(result);

            $("#theJson").html(tmp);

        },
        error: function(jqXHR, textStatus, errorThrown) {
            alert("Issue fetching the JSON: "
                + textStatus + " "
                + errorThrown + " !");
        }

    });

}
If successful, we set the result on the <div>, else we pop-up a message with the error.

Controller

The controller is kept simple, and a MilliTime object is returned for the Ajax call:
@Controller
public class MyController {

    @RequestMapping(value = "/")
    public String home(Model model) {
        return "index";
    }

    @RequestMapping(value="/getJSON", method = RequestMethod.GET)
    public @ResponseBody MilliTimeItem getJSON() {
        return new MilliTimeItem(System.currentTimeMillis());
    }

}

Running The Example

Once compiled, the example can be run with mvn tomcat:run. Then, browse:

  http://localhost:8585/spring-fetching-json-with-ajax/

After clicking on the Fetch JSON button, something similar to the following will be displayed:


More Spring related posts here.

Serving Static Resources With Spring MVC

This post explains how to server static content from a Spring MVC web application. It is based on the Spring MVC With Annotations example. The code is available on GitHub in the Spring-Serving-Static-Resources directory.

JSP Page

We keep only the main index.jsp page:
<%@page contentType="text/html" pageEncoding="UTF-8"%>
<%@ taglib prefix="c" uri="http://java.sun.com/jsp/jstl/core" %>
<!doctype html>
<html lang="en">
<head>
  <meta http-equiv="Content-Type" content="text/html;" charset=UTF-8">
  <script type="text/javascript"
    src="https://ajax.googleapis.com/ajax/libs/jquery/1.8.2/jquery.min.js">
  </script>
  <script type="text/javascript"
    src="<c:url value='/resources/js/SomeJavascript.js'/>">
  </script>
  <title>Welcome To Spring Serving Static Resources !!!</title>
</head>
<body>
    <h1>Spring - Serving Static Resources !!!</h1>
    <img border="0"
      src="<c:url value='/resources/img/MyArt.png'/>" alt="My Art" />
</body>
</html>
Regarding static resources:
  • We link JQuery from Google's CDN.
  • We link our own SomeJavascript.js and make sure the URL is properly constructed.
  • In the body, we add an image.

Resources

Spring Project Structure For Resources
In the Spring project itself, we put all the resources under a separate resources directory which does not stand under WEB-INF.
  • Images are stored under /resources/img.
  • Javascript is storted under /resources/js.
Our Javascript is a simple pop-up messages displayed when the HTML document is loaded:
$(document).ready(function() {
    alert("JS loaded successfully!");
});

Web Configuration & Controller

We need to modify our web configuration to add a static resource handler and configure it by specifying where to fetch these:
@EnableWebMvc
@Configuration
@ComponentScan(basePackages = "com.jverstry")
public class WebConfig extends WebMvcConfigurerAdapter {

    ...

    @Override
    public void addResourceHandlers(ResourceHandlerRegistry registry) {

      registry
        .addResourceHandler("/resources/**")
        .addResourceLocations("/resources/");
    }

}
We also simplify our controller:
@Controller
public class MyController {

    @RequestMapping(value = "/")
    public String home(Model model) {
        return "index";
    }

}

Running The Example

Once compiled, the example can be run with mvn tomcat:run. Then, browse:

  http://localhost:8585/spring-serving-static-resources/

The image and the pop-up will be displayed:


More Spring related posts here.

Monday, 29 October 2012

Spring MVC Form Validation (With Annotations)

This post provides a simple example of a HTML form validation. It is based on the Spring MVC With Annotations example. The code is available on GitHub in the Spring-MVC-Form-Validation directory.

Data

For this example we will use a bean and JSR303 validation annotations:
public class MyUser {

    @NotNull
    @Size(min=1,max=20)
    private String name;

    @Min(0)
    @Max(120)
    private int age;

    public MyUser(String name, int age) {
        this.name = name;
        this.age = age;
    }

    public MyUser() {
        name = "";
        age = 0;
    }

    // Setters & Getters

}

Pages

Our form will contain input elements, but also the possibility to display error messages:
<%@page contentType="text/html" pageEncoding="UTF-8"%>
<%@ taglib prefix="form" uri="http://www.springframework.org/tags/form" %>
<!doctype html>
<html>
<head>
  <meta http-equiv="Content-Type" content="text/html; charset=UTF-8">
  <title>My User Form!</title>
</head>
<body>
  <form:form method="post" action="myForm" commandName="myUser">
    <table>
      <tr>
        <td>Name: <font color="red"><form:errors path="name" /></font></td>
      </tr>
      <tr>
        <td><form:input path="name" /></td>
      </tr>
      <tr>
        <td>Age: <font color="red"><form:errors path="age" /></font></td>
      </tr>
      <tr>
        <td><form:input path="age" /></td>
      </tr>
      <tr>
        <td><input type="submit" value="Submit" /></td>
      </tr>
    </table>
  </form:form>
</body>
</html>
Our success page is:
<%@page contentType="text/html" pageEncoding="UTF-8"%>
<%@taglib prefix="form" uri="http://www.springframework.org/tags/form"%>
<%@ taglib prefix="c" uri="http://java.sun.com/jsp/jstl/core" %>
<!doctype html>
<html>
<head>
  <meta http-equiv="Content-Type" content="text/html; charset=UTF-8">
  <title>Form Processed Successfully!</title>
</head>
<body>
    Form processed for <c:out value="${myUser.name}" /> ! <br />
    <a href="<c:url value='/'/>">Home</a>
</body>
</html>
Our home page:
<%@page contentType="text/html" pageEncoding="UTF-8"%>
<%@ taglib prefix="c" uri="http://java.sun.com/jsp/jstl/core" %>
<!doctype html>
<html lang="en">
<head>
  <meta charset="utf-8">
  <title>Welcome !!!</title>
</head>
<body>
  <h1>
    Spring Form Validation !!!
  </h1>
<a href="<c:url value='/myForm'/>">Go to the form!</a>
</body>
</html>

Controller

Notice that we need to use @ModelAttribute to make sure an instance of MyUser is always available in the model. In the validateForm(), we need to use @ModelAttribute to move the content of the form to the MyUser project.
@Controller
public class MyController {

    @RequestMapping(value = "/")
    public String home() {
        return "index";
    }

    @ModelAttribute("myUser")
    public MyUser getLoginForm() {
        return new MyUser();
    }

    @RequestMapping(value = "/myForm", method = RequestMethod.GET)
    public String showForm(Map model) {
        return "myForm";
    }

    @RequestMapping(value = "/myForm", method = RequestMethod.POST)
    public String validateForm(
        @ModelAttribute("myUser") @Valid MyUser myUser,
        BindingResult result, Map model) {

        if (result.hasErrors()) {
            return "myForm";
        }

        model.put("myUser", myUser);

        return "success";

    }

}

Maven Dependencies

We need the following dependencies. The Hibernate validator dependency is necessary to process JSR303 annotations:
<dependency>
  <groupId>javax.validation</groupId>
  <artifactId>validation-api</artifactId>
  <version>1.0.0.GA</version>
  <type>jar</type>
</dependency>

<dependency>
  <groupId>org.hibernate</groupId>
  <artifactId>hibernate-validator</artifactId>
  <version>4.3.0.Final</version>
</dependency>

Running The Example

Once compiled, the example can be run with mvn tomcat:run. Then, browse:

  http://localhost:8383//spring-mvc-form-validation/.

If the end user enters invalid values, error messages will be displayed:


More Spring related posts here.